配置 AR 场景
本文以图像跟踪为例,介绍如何配置一个最简单的 AR 场景。
开始之前
- 按 启用 EasyAR 的内容导入 EasyAR Sense Unity 插件并填写许可证(License Key)。
注意
如果您的工程使用了 URP (Universal Render Pipeline) ,还需要额外 配置 URP 。
添加 AR Session
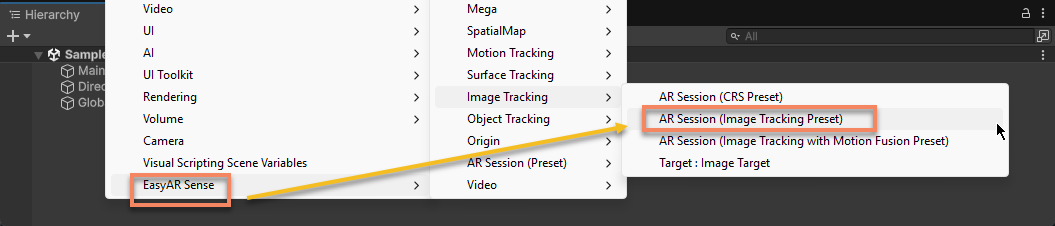
在 Hierarchy 视图中,在 空白 处点击右键,通过菜单 EasyAR Sense > Image Tracking > AR Session (Image Tracking Preset) 创建一个用于图像跟踪的 session。
配置摄像机
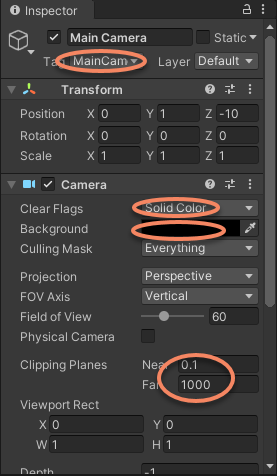
选中 Main Camera, 在 Inspector 设置以下参数。
- 设置
Clear Flags为Solid Color。 - 设置
Background为黑色。 - 设置
Clipping Planes的Near为 0.1(米),Far为 1000(米)。
添加 Target
在 Hierarchy 视图中,在 空白 处点击右键,通过菜单 EasyAR Sense > Image Tracking > Target : Image Target 添加一个 Image Target,默认显示为问号图标。

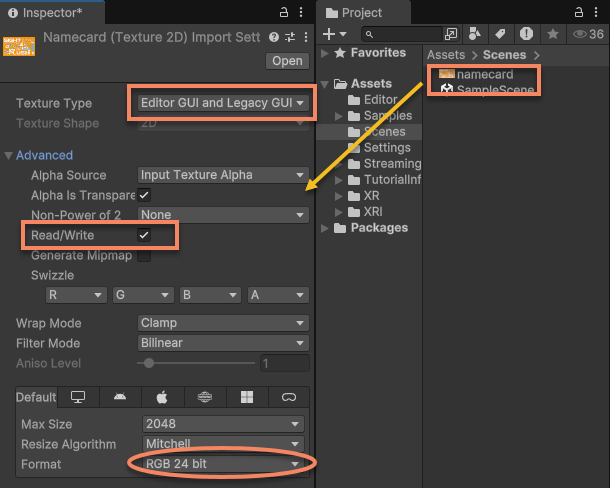
选中需要跟踪的图像,设置以下参数,并点击 Apply 按钮应用设置:
- 设置
Texture Type为Editor GUI and Legacy GUI。 - Advanced 中启用
Read/Write。 Format设置为RGB 24 bit。
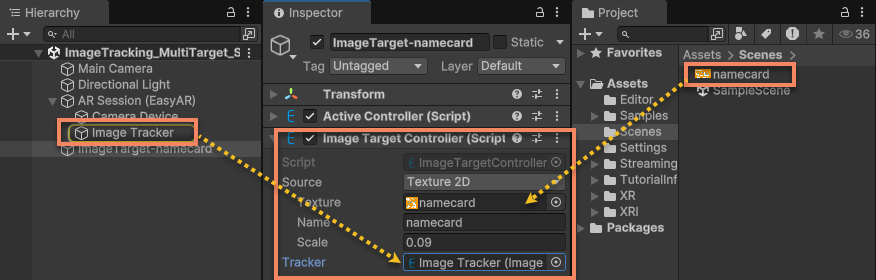
配置 ImageTargetController:
- 设置 Source Type: 为
Texture 2D。 - 设置 Texture 为配置好的图片。
- 设置 Name 为 namecard。
- 设置 Scale 为 0.09(表示 0.09 米)。
- 设置 Tracker 为 ARSession 下的
ImageTrackerFrameFilter。
提示
Source Type 不同时,部分配置内容会有所不同。
添加跟随 Target 的 3D 内容
在 Image Target 节点下添加的 3D 内容相对图片的位置保持不变,即图片移动之后,虚拟内容跟随显示。
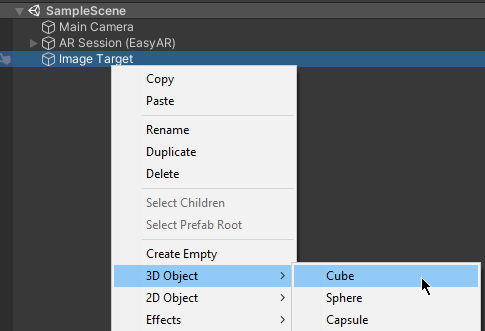
在 Hierarchy 视图中,选中 Image Target,通过菜单 3D Object > Cube 添加一个 Cube。
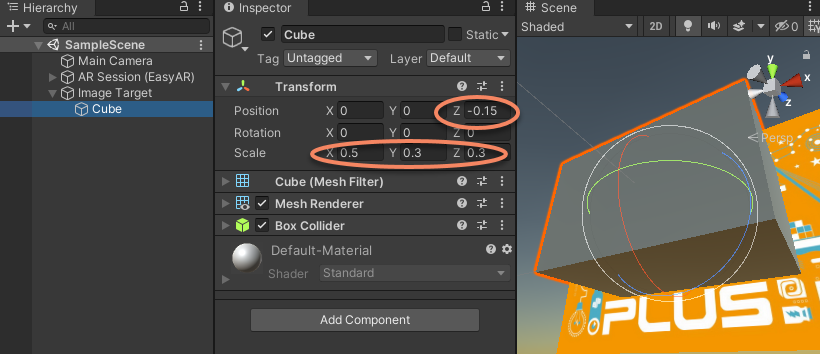
选中刚才添加的 Cube,配置其属性:
- 设置 Transform 的
Scale为 {0.5, 0.3, 0.3}。 - 设置 Transform 的
Position的z值为 -0.15 (使 Cube 底面与识别图对齐)。
到这里,一个最简单的 AR 场景就配置完成了。运行场景并对准图片,即可看到 Cube 出现在图片上方。
后续步骤
- 运行中会注意到屏幕上会显示黄色文字,可以阅读 场景中的诊断信息 了解这些信息的含义以及常用配置方法。
相关主题
- 了解 AR Session
- 了解 AR 场景中的 Camera
- 了解 Target